Burnt Garlic Noodles

Some times when you make a very spicy chicken curry or soup, the best thing to go with it is a nice flavorful noodle. The first time I had this dish was at a restaurant many years ago and it went very well with Lee Fu Prawn (Curry). My husband likes this noodle with any chinese / indo chinese dish. So I made it to accompany the chilly chicken. We love eating out and we make it a point to try new places every week. With the little one getting restless and wanting to crawl around, it really isn’t that easy to try new places. I think this time we will try an Asian place. Alright, what you should remember about this noodle is that is a very very flavorful and you can decide how pungent you want it to be. So do not be hesitant, make a whole batch of the burnt garlic powder ahead of time and store it in you fridge. You can use it whenever you want.

You don necessarily need to make the garlic powder ahead of time. This recipe is a quick version of it. I will put up a post later as to how you can make the powder and store it  too.

 Ingredients:-

  • Garlic – 3 tbsp (cleaned, peeled and chopped into fine pieces)
  • Noodles – half packet
  • Salt – 1tsp + 1tsp
  • Oil – 2 + 2 + 2 tbsp
  • Vinegar – 2 tbsp
  • Soya Sauce- 2 tsp
  • Dry Red Chilly –3
  • Star Anise –2
  • Spring Onion – 4 stems (cut into small pieces)
  • Onion – ½ small cubes

 Instructions :-

  • Heat oil in a pan and once the oil is hot, add chopped garlic. Let the garlic fry well, it will turn from white, to pale yellow, to golden brown to a coffee brown
  • Scoop the garlic out of the pan and place in a plate to cool. Then use a mortar and pestle to grind the garlic to a fine powder ( If you want a more pungent flavor just let the garlic fry for a little longer but don let it burn, cause then its just going to be bitter and burnt!)
  • Then just as you would for any other noodle, boil water in a pot and once it begins to boil, add salt, oil (1tbsp) and the noodle. Cook till they are soft and have gained their full shape. Then using a colander grain the water out and let the noodle remain in the colander. Use 1 tbsp of oil and mix into the noodle. This will ensure that the noodles don stick to each other once cold
  • Now the easy part. Heat oil (2tbsp) in a wok and once hot add red chilly and star anise. Add onions at this stage
  • After that add the burnt garlic powder and toss in the noodles.
  • Add the vinegar + soya sauce + chilly sauce to the noodle and stir well. Make sure all the garlic powder and sauce coats the noodles well. Cook for around 10 mins till you can smell the pungent garlic.
  • Add spring onions and close the wok. Switch off the flame and transfer to your serving dish. This noodle is best serve best off the wok with any spicy chicken or duck gravy.
  • Enjoy  🙂

Chilli Chicken / Indo Chinese Style/ Nadan Chilli Chicken

Chilli Chicken / Indo Chinese Style/ Nadan Chilli Chicken

Street food is a big deal back in Kerala and by far the most sought after delicacy is the “Chilly Chicken and Parrotta” that you will find in any and every “Thattukadda” (a make shift restaurant that serves fast food). They usually open up by around 6 in the evening and they serve a variety of fast food, like a 100 different kinds of Dosa’s ( Crepe) , Idilli, Vada, Chaya ( Tea), Kappi ( Coffee), Kappa & Meen Curry (boiled tapioca and fish curry), Chicken fry etc …

So I was in a mood for some street style “Nandan” food and I love Chilly Chicken, so here it is…


Ingredients

For Marination –

  • Boneless Chicken – ½ kg
  • Soya Sauce – 1 tsp
  • Pepper Powder – 1 tsp
  • Chilly Powder – 1 tsp
  • Yogurt – 3 tbsp
  • Salt – ½ tsp

 For the Main Dish

  • Cornflower – 2 tsp
  • Oil – 4 tbsp + 2 tbsp
  • Soya Sauce –1 tsp
  • Chilly Sauce –2 tsp
  • Vinegar –1tsp
  • Green Chillies – 3 chopped fine
  • Onions – 1 Cut into flour
  • Capsicum, Green Bell Pepper – ½ (Optional)
  • Ginger garlic paste – 1 tsp
  • Spring Onions – 3 stems (cup small)

Instructions:-

  • Clean the boneless chicken well and make sure you rinse it twice or thrice in clean water
  • Mix all ingredients for the marinade (except chicken) and make a nice thick paste. If you find that it marinade is not sufficient, add a more pepper powder and yogurt. Let the meat marinate for at least two hours. I usually leave mine in the fridge overnight. Some how the flavors just comes out better and the meat is nice and juicy
  • Once you are ready to make the chicken, mix corn flour with the chicken and coat the pieces well. This is what gives it that nice crispy coating, but you do not want to over do it cause then is just tastes like a big blob of corn flour. Heat oil in a pan and once hot fry chicken pieces till nice and golden brown. Set them aside on pieces of tissue to let the oil drains out
  • In another wok, heat 2 tbsp of oil and once nice and hot add ginger garlic paste. Then add onions ( big and spring onions, bell pepper and let it cook on low flame just for a minute
  • Mean while, make a mixture of the soya sauce, vinegar, chilly sauce and pour into the wok with the onions and bell pepper. Once the mixture starts to bubble add in the fried chicken and let the mixture coat the chicken well
  • Bump up the flame to high for just a min and then turn it off. Garnish with a cut chilly


Mango Carrot Ginger Juice!

I love a good healthy cleaning drink  and I realize that added sugar isn’t good. I wanted a way to detox my self as well help with acidity and asthma. So I found a quick and tasty way to do that.  My mango carrot and ginger juice. Its sweet, it has fruit and it keeps you tummy full for a while too! Carrot and honey help cleans your skin, while ginger helps with detox, acidity and asthma!

Mango Carrot Ginger Juice

Ingredients for one glass

Ripe mango – 1 cup
Carrot – 1
Dry ginger powder – 1/2 tsp
Honey – 1 tbsp
Water – 1 cup

Instructions –

  • In a blender combine all the ingredients apart from the honey. Once it has reached the consistency you like add honey accordingly and check for sweetness. You might not need all the honey as the sweetness in the mango will also do.
  • Pour into a glass of choice and add ice cubes if you like! The ice cubes help reduce the pungency of the ginger.  Stay healthy!!

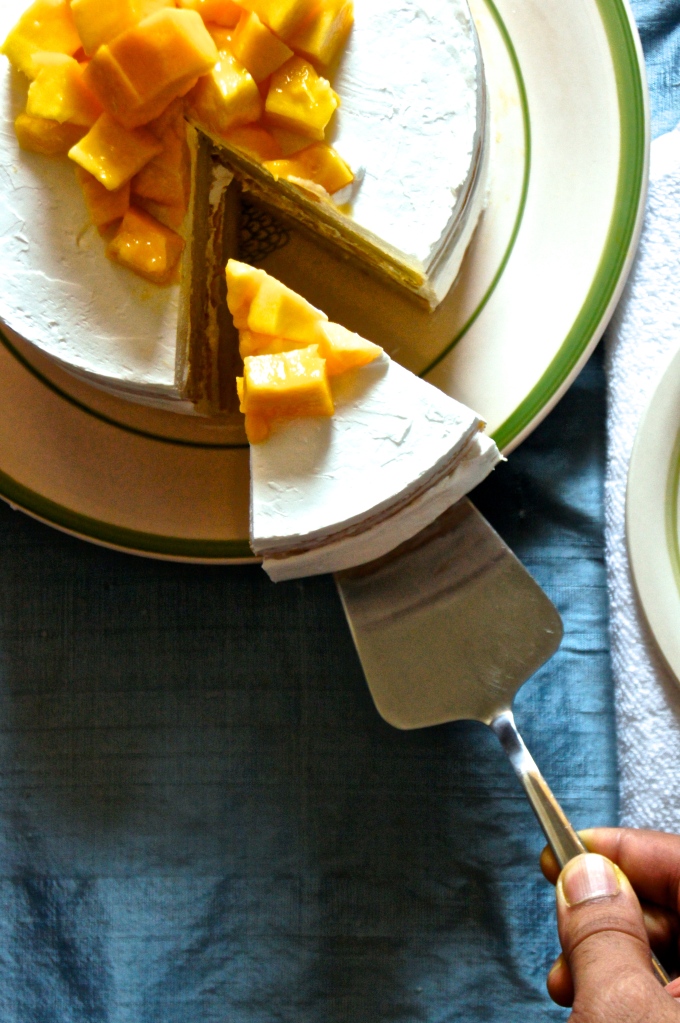
Simple Mango Cake with Hidden mango chunks

Mango Cake


Mango Cake


Staying on the mango track, I wanted to make a simple mango cake with fresh mango pieces in the centre, so every bite is filled with cake, cream and fruit! I love how fruit and cake get along. They are soul mates, just like chocolate and coffee! Mangoes have this nice soft texture that your tongue falls in love with the moment its in your mouth and suddenly there is a russsshh of sweetness and then a little hint of sour. Personally I like mangoes that are not too ripe. But mangoes are mangoes. You can’t just ignore them.

I think the love for mangoes runs in my family. My grandparents had this huge orchard that was filled with some 20 varieties of mango. And my mother tells me that every mango was so different from the other. One tasted like sweet honey and smelled like camphor. Once was as red as a cherry and when ripe would still be only the size of a 1 year olds palm. I have heard stories of how it would rain so heavily that mangoes would fall onto the wooden roof of the house that would cause a loud thud at nights. Next day the floor of the gardens would be filled will bees and little birds hovering around fallen fruit…

 Ingredients

Flour – 1 ½ cup
Butter – 100 gms
Sugar – 1 cup
Mango Puree –1/2 cup thick puree
Vanilla Extract –1 tsp ( you can also use mango extract in addition)
Salt –1/2tsp
Baking Soda – 1/2tsp
Baking Powder – 1tsp
Eggs – 2 (separated and at room temperature)

Instructions:- 

  • Preheat the oven to 180, Butter two 8 inch pans set aside
  • In a bowl add butter and sugar whisk.
  • Once the mixture is pale add mango puree and whisk
  • Add egg yolks one after the other and later add the vanilla extract and salt.
  • In another bowl combine, baking powder, baking soda and flour
  • Add the dry mixture to the wet ingredients
  • Then in a clean dry bowl whisk the egg whites till stiff peaks are formed
  • Slowly fold egg whites into the flour mixture a little at a time ( Try not working the batter too much as you want to retain the air in the egg whites, that is what makes this cake light and fluffy)
  • Pour the batter into both cake pans equally. I usually weigh the bowl first and divide it equally, weighing each pan again)
  • Let them bake for 30 – 40 mins.
  • Once done let them cool off on a rack and then pop them out of the pan

Assembling –

Whipping Cream – 2 cups
Cut Mango – 2 cup
Vanilla Extract – 1 tsp
Sugar – ½ cup

  • In a bowl, add the whipping cream and whisk till it starts to thicken. Gradually add sugar and vanilla extract
  • Once done arrange one cake on your cake plate/ board and spread some whipped cream on top of it. Add as many mango pieces as you like on top of the whipped cream .Then add another layer of whipping cream and even it out

Place the next cake on top and crumb coat the entire cake with the left over cream. You can choose any finish it off and decorate it as you like. I just wanted the naked cake look so I left it as it is.


Kerala Style Fish Fry (Dedicated to my Amma for mothers day)

A perfect Kerala style lunch should and must consist of a fish fry! And this recipe is the one my mom taught me. I love Seer fish. There is just one big bone that runs in the centre of the fish and its very easy to clean too. I will do a segment on how to clean a fish once. It is important that you clean fish well in order to avoid food poisoning and also that pungent smell while cooking it.

♥ Fish can be very tricky when it comes to tossing it over when you fry it. So be careful and handle it gently. Unlike meat like chicken or mutton, it tends to break into pieces if not handled with care. Use a nice flat spatula to turn the fish over. I used a burger flipping spatula. Any kind would do just as far as it has a nice flat mouth that will allow the fish to sit as a whole on it

♥ While frying the fish, after placing the pieces on the pan, keep it pan closed for a few mins. This will allow the fish to cook from within and also remain nice and soft on the inside

 ♥ Try not to put too many pieces as at once cause when you flip the pieces over you really want a lot of space to move around and maneuver the fish

Kerala Style Fish Fry

Kerala Style Fish Fry


Kerala Style Fish Fry

Ingredients 

 For Marinating :-

  • Fish Pieces – 6 big pieces ( I used Seer Fish)
  • Small Onions / Shallots – 6-8 peeled and blended to a paste
  • Ginger Garlic Paste – 1 tbsp
  • Pepper Powder – 1tsp
  • Chilli Powder – 1 tsp
  • Turmeric Powder – ½ tsp
  • Coriander Powder – ½ tsp
  • White Vinegar – 1 ½ tbsp
  • Salt – 1 tsp

 Frying:-

  • Oil – 4 tbsp ( any neutral smelling oil will do)

Instructions:-

  • Mix the chilly + turmeric + coriander + ginger garlic paste + shallots paste + pepper powder + salt and vinegar. This will make a nice think red paste
  • Apply this paste on the fish pieces liberally coating the fish completely
  • Keep aside to marinate for 1 – 2 hrs
  • Once ready to fry, heat oil in a pan (I used a flat pan cause I did not want to deep fry the fish)
  • Slowly place the fish on the heated oil and cover for the first two minutes. This will help contain the moisture in the fish and let it cook in its juices. And once one side is down gently turn to the other side and fry well.
  • Serve fish hot along with flavored ghee rice and “challas”/ the simple onion salad


Kerala Style Fish Fry

Simple Onion Salad / Kerala style / Challaas

My next post is an authentic Kerala style fish fry for which the perfect accompaniment is a “Nadan” salad. Back in Kerala it’s called Challaas. Usually when alcoholic drinks are served with fish fry, Challas is a must. So here it is.

Simple Onion Salad
Simple Onion Salad

Ingredients –

Onions – 2 large
White Vinegar – 2tbsp
Green Chilli – 2
Salt – ½ tsp

Instructions –

  • Cut onions length wise and green chilli’s into small thin round circles.
  • In a bowl add the onions, chilis, vinegar. Toss in the salt and mix it all up nice and well. Serve straightaway or the onion will lose water and it will become soggy .

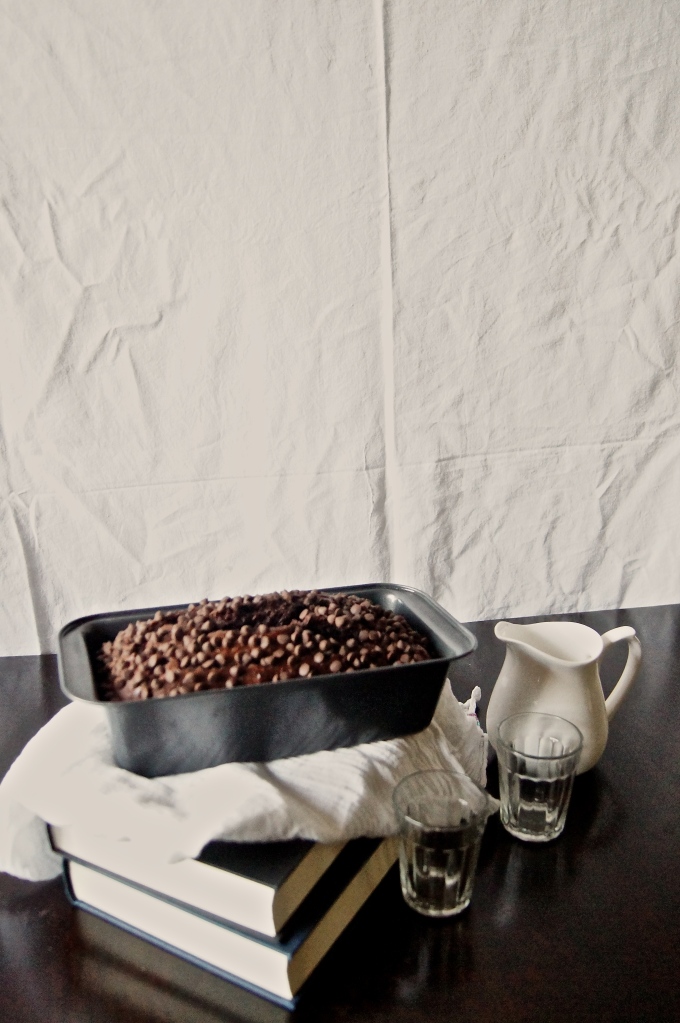
Double Chocolate Banana Bread


SONY DSC

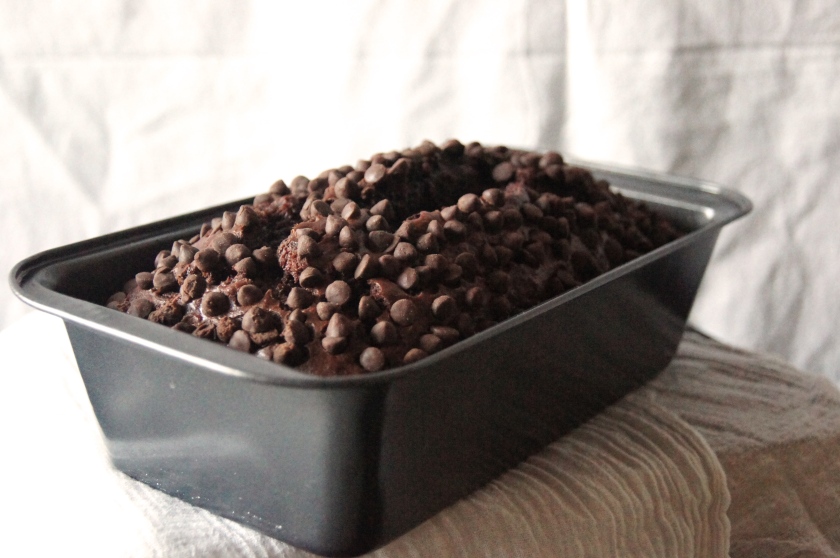
Hello there.. How’s everyone doing today? I am in a good and chirpy mood today. No particular reason actually. Just happy … Its almost the weekend and guess what I have left in my fruit basket? Yes. It’s another bunch of ripe bananas. So what else can I make with them. This time I made a double chocolate banana bread loaf. This one is also a one-bowl recipe and doesn’t need a lot of time either. I personally think it’s a chocolate banana cake. Its nice and moist and sweet and it has chocolate! So why not! You can either have it for breakfast with you coffee or after lunch as a quick dessert. (Guess what I packed as dessert for my husband today :p)

SONY DSC

Chocolate Banana Bread

Ingredients –

Flour – 1 + ½ cup
Banana – 3 medium size (mashed or pureed)
Baking Soda- 1 tsp
Salt- a pinch
Coco Powder – 3/4 cup
Milk- 2 tbs
Powdered Sugar – 3/4 cup
Eggs – 2
Butter – 1cup
Vanilla Extract – 1 tsp
Chocolate Chips – ½ cup (or as much as you choose)

Instructions –

Preheat the over to 180C and line or grease the cake pan with butter and set aside

In a big bowl, first whisk the eggs and butter till nice and pale. Then add milk, vanilla extract and mashed bananas and mix well

Place a sieve on top of the bowl and add flour, sugar, baking soda, salt and cocoa powder and sieve into the banana mixture

Using a spatula mix the contents of the bowl well till the dry mixture has combined well with the wet ingredients

Pour into the cake pan. Sprinkle chocolate chips on top of the batter

Bake for 30 – 40 mins or till a toothpick inserted comes out clean

Best served hot with coffee

Enjoy 🙂

SONY DSC

SONY DSC


Cinnamon Vanilla Coffee

Making coffee every morning is as rudimentary as brushing your teeth or staring at your reflection in the mirror every morning. So to cut down the monotony in this mundane routine maybe you could spice it up with a little cinnamon.

The days I know my husband is going to have a long day at work or he just needs that extra punch to set off his day on a happy note, I make him this coffee and it leaves a smile on his face. I hope you enjoy it too.

Ingredients –

Milk – 2/3 Cup
Water – 1 / 3 Cup
Coffee Powder – 2 tsp (more if you want it stronger)
Cinnamon Powder – a pinch
Sugar – 2 tsp
Vanilla Extract – 1 tsp

Procedure –

Mix water and milk in a pan and set to boil. Once the water is hot, add the coffee and cinnamon powder. Let it bowl but take care not to let it spill out. Switch off the flame and cover the pot to let the coffee infuse. ( A minute or two is fine)

Then add the sugar and vanilla extract to the coffee and strain it into your favorite cup

Have a good day 🙂

Cinnamon Vanilla Coffee

Chocolate Beetroot Cake

Ok I know that sounds off! Beetroot in cake?!? Well even I was apprehensive the first time some one mentioned beetroot and cake in the same sentence! But once I made the cake I was actually surprised how that red red vegetable can add so much more to a simple chocolate cake!  Well if you are someone who likes a little change sometimes, maybe you should try it!

This one is not my recipe and I have adapted it from http://www.nigella.com/recipes/view/beetrootchocolate-cake-1273

I did make a few changes to the original recipe as it produced a harder cake.

Beetroot Chocolate Cake
Chocolate Beetroot Cake

Ingredients:-

Beetroot – 1 Cup ( Boiled – puree)
Flour – 1 + 2/3 Cup
Sugar – 1 Cup (plus 2 table spoons)
Coco Powder  – 2/3 Cup
Baking Powder – 2 tsp
Milk – 2 tbsp
Eggs – 3
Oil – 200 ml

Instructions:- 

  • Preheat the oven to 190 C. Butter a 20cm cake pan and set aside
  • In one bowl combine flour, sugar, coco powder, baking powder and set aside
  • In another bowl combine the pureed beetroot, oil, milk, and eggs. Whisk together all wet ingredients till well combined
  • Slowly add the dry mixture to the wet beetroot mixture in three halves. Scrap the sides of the bowl to mix all the ingredients well
  • Finally add the batter to the cake pan and bake for 40 – 50 mins or till a toothpick inserted comes out clean
  • Enjoy 🙂

Chocolate Beetroot Cake