ALFAJORES – Dulche de leche sandwich cookies


I have always been afraid of the cooker. Even when I make simple “Dal Chawal ” at home,  worry that it might explode, so I never stay in the kitchen while it is on the stove. So when I decided to make Dulche De Leche I woke up early this morning and decided to do it when my baby was far away from the kitchen and my husband was at home! ( You know thinking worst case scenario and all)! But to my surprise nothing happened! yeah I know you are laughing at me. The truth is I though I would be left with a broken stove, exploded cooker and a room full of condense milk and water. Yes go ahead! laugh! That my friend is my biggest nightmare. So when ever there is anything cooking in my kitchen I never let my son in. And when the cooker is on the stove, even I do not stand in the kitchen.( i rush in just to switch it off :p)

When I finally opened the can of condense milk, OH MY GOD! That is when I realised how delicious this version of the condense milk is! Now I know what the fuss is all about! That sweet caramely liquid inside that can was like I was in heaven! That minute I knew I should have let it sit for maybe one more whistle but thats ok . I am happy with the outcome.

Ok before I get to how I made the cookies, if you were wondering how I made that dulche de leche, I used the pressure cooker method.

Ingredients:-

  1. Flour – 1 cup ( set aside one teaspoon from the cup)
  2. Corn Flour – 1 cup
  3. Baking Powder – 1 tsp
  4. Baking Soda – 1/2tsp
  5. Butter – 113 gms
  6. Sugar – 1/3 cup
  7. Vanilla Extract – 2 tsp
  8. Egg Yolks – 2 ( at room temperature)
  9. Brandy – 1tbsp + 1 tsp ( for the Dulche de leche)
  10. Crushed Nuts – 1 cup ( use any kind of nut you like – wall nuts, cashews, pecan, almonds)
  11. Dulche De Leche – 1 can

Instructions :-

  1. In a bowl mix flour, corn flour, baking powder, baking soda and salt. Set aside
  2. In another bowl cream butter and sugar
  3. Add egg yolks one at a time. Then add vanilla and Brandy
  4. Now add dry ingredients into the wet ingredients little by little. Cream well. I used my hand blender but a whisk will do the job too
  5. Once you have added all the flour it will come together to make a nice ball
  6. Now wrap the ball with cling wrap and refrigerate for 30 mins to an hour
  7. While the dough is resting in the fridge, pre heat your oven to 180C
  8. Once the dough is read, light dust your counter top with the one tsp of flour that you set aside in the beginning
  9. Roll out the dough making sure to keep an even width of 4mm at least. I used my seated cookie cutter but you can cut them out in any space you want
  10. Slowly place them on your cookie tray leaving 3 – 5 cms apart from each other
  11. Pop them into the fridge for 10 mins
  12. When you are ready to bake these cookies, pop them into the area heated oven and bake for 10 to 15 mins
  13. You do not need to wait till they are brown. You will see them rise a little and the flaky sides are clearly visible
  14. Pull them out of the oven and let them sit on a cooling rack till completely cool
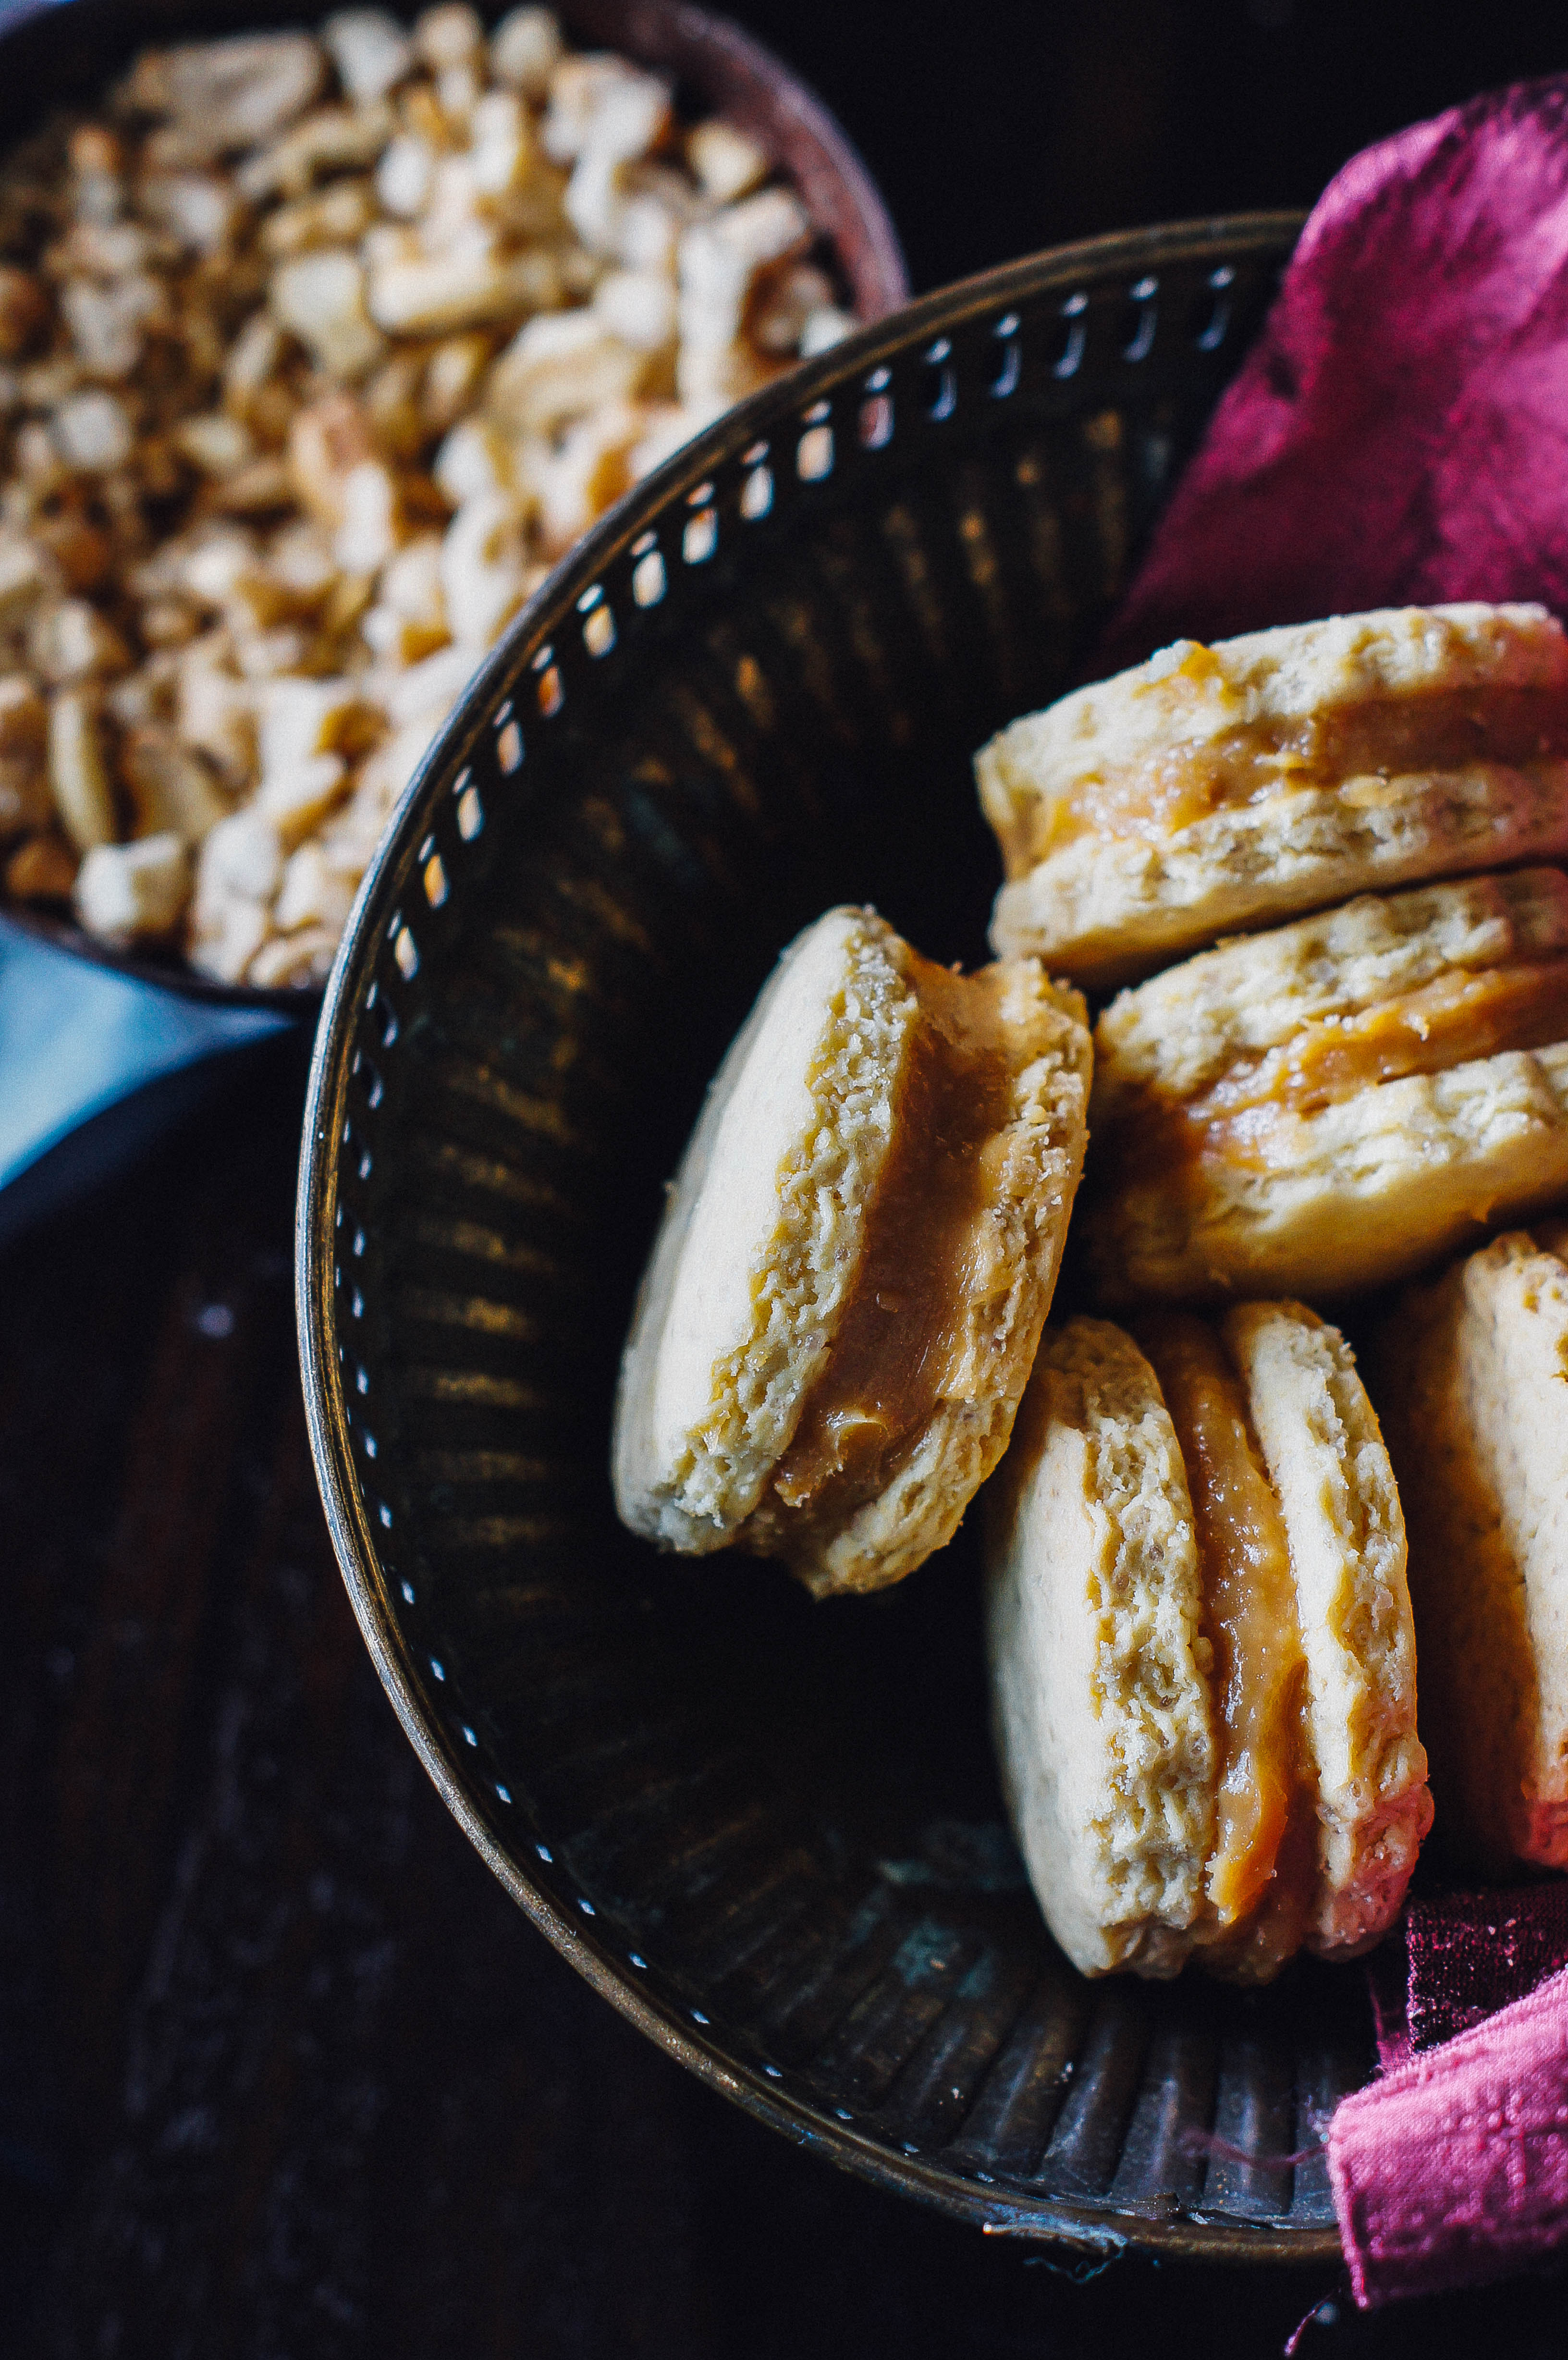
  15. Once cooled completely add dulche de leche on one side of a cookie and sandwich it with another cookie. I recommend adding one table spoon of brandy to the dulche de leche for that mild yet exotic flavour!
  16. You can roll them in any crushed nut that you like. Typically they are rolled in coconut flakes, but I love salted cashews so thats what I used! This part is your choice. You could use chocolate flakes, walnuts, pecans, almond! Any thing you like


Za’atar Spiced Sweet Potato Fries (Baked)


Ok this one is a quick snack. Sweet Potato bakes with garlic Mayo!!

Ingredients :-

  1. Sweet Potatoes – 3 medium size ( washed, skinned and cut to long pieces)
  2. Zatar Spice – 1 tbsp
  3. Yogurt/ Curd – 1 cup
  4. Chilli powder – 1 tsp
  5. Salt – 1/2tsp
  6. Olive Oil – 1tsp

Instructions :-

  1. In a bowl mix the zatar spice, chilly powder, salt and curd. Mix well to make a nice paste
  2. Now into the same bowl drop the cut sweet potatoes
  3. Coat the sweet potato well with the spice paste. Set aside for half an hour
  4. Mean while, preheat your oven to 180C
  5. After half n hour, line your baking tray with baking paper and arrange the marinated sweet potatoe over the baking tray. Try to leave some space between each piece
  6. Before popping it into the oven, drizzle some olive oil over the potatoes
  7. Let them bake for 15 – 20 mins to till nice and golden brown
  8. Some ends might turn black but some how they just add more taste


Sticky Date Pudding Cake


I love dates! I think they are absolutely healthy and a great substitute for sugar. But this cake does need lots more that just the sugary sweetness of the dates itself. The life of this cake is the dates in it and the butterscotch sauce. I have had sticky date pudding at grand buffets and once at a wonderful christmas dinner at a dear friends place. This is her version of the pudding but I was too lazy to put them in individual ramekins and therefore this is my Sticky date pudding cake. But I must tell you, that this cake is very very decadent and if you are trying to lose weight, this is not your cake!!!! My husband caught me scraping the little bits off the cake tin before I even took the photos. It is really good! sweet and crunchy cause of the wall nuts and if you want you could add whipped cream or vanilla ice cream. But this cake is so sweet on its own, you really do not want to add any more sweetness to it.

I should tell you, that after I cut a piece for the photos, I fed my baby a pieces of the cake. And from that moment he refused to have his own food. He skipped lunch and even now if he sees me with a smaller plate he thinks its cake! Lesson, do not feed you baby cake!! Just not yet!!

First for the Butter Scotch Sauce

Ingredients:-

  1. Brown sugar- 200gms
  2. Butter – 50gms
  3. Cream – 200 ml
  4. Vanilla Extract -2 tbsp

Instructions :-

  1. In a pot add sugar and butter and bring to a simmer. (Do not mix or stir at this point)
  2. Once the mixture begins to simmer add in the cream. At this point the sugar butter mixture should have begun to boil and bubble
  3. Take it off the flame and whisk well. Add vanilla and let it cool completely


For the Cake

Ingredients :-

  1. Dates – 250gms
  2. Water – 312 Ml
  3. Baking Soda – 1 tsp
  4. Butter – 60 gms at room temperature
  5. Flour – 190 gms
  6. Baking Powder – 1 tsp
  7. Brown Sugar – 150gms
  8. Eggs- 2 at room temperature
  9. Vanilla Essence – 1 tsp
  10. Walnuts – 1 cup
  11. Chocolate chips – 1/2 cup

Instructions :-

  1. In a pot, add water and dates. Bring water to slow boil and let the dates cook till they are soft and mashable
  2. Once the dates have cooked well, take the pot off the heat. Add baking soda and butter into the dates. You will see the mixture froth up and bubble. Set aside to cool down (make sure you bring the dates to room temperature before you follow the next steps
  3. Meanwhile preheat your oven to 180C and butter and line your cake pan. I used my 6inch pan.
  4. In a bowl, mix flour, baking powder and brown sugar. Make sure you whisk the this mixture once, so as to ensure there are no lumps of sugar.
  5. In another bowl, beat eggs and vanilla essence
  6. Now in batched of three, first add the egg mixture to the dates and then the flour mixture. Make sure you add them slowly and mix till combines well. (Like in all cakes, I do not over work the batter for this one too)
  7. Now pour your batter into the pan and pop it into the oven and bake for 30 – 40 mins or till the tooth pick inserted comes out clean
  8. Once done, let the cake rest for a while before removing it from the cake pan
  9. Serve with the butterscotch sauce and sprinkle nuts and chocolate chips as much as you like 🙂


Tips 

  1. Use seedless dates
  2. Make sure your cream and butter are at room temperature for best results
  3. I heat my butterscotch for just a few seconds in the microwave before serving it


Kulukki Sherbat / Kulukki Sherbet – Pineapple & Lime Sherbet


I love street food but like I said, I am very very scared of falling sick. Time and again I have tried street style food and some how I manage to fall sick 5 out of 10 times. So it takes me a while to taste food off the road. Once such drink is the Kulukki Sherbat. My friend in Kerala was kind enough to make me a glass of this wonderful drink 2 years ago and from then on I have been in love with this drink. It is the perfect blend of sweet, sour and spicy!

Ingredients :-

  1. Pineapple – 1/2 cup (chopped to fine pieces)
  2. Lime Juice – from 3 limes
  3. Sabja Seeds / Basil Seeds – 2tbsp (washed and soaked for 10 mins)
  4. Ginger – 1 tsp (chopped fine)
  5. Green Chilli – 1 ( chopped fine)
  6. Honey – 3 – 4 tbsp ( or according to taste)
  7. Water – 1.2 lt (cold)
  8. Ice cubes – as required

Instructions:-

  1. In a bottle add lemon juice, honey, ginger and chilli. Put the cap on the bottle and give it a nice shake for 5 seconds
  2. Then add the rest of the ingredients including the ice cubes. Put the cap back on the bottle and give it a nice shake again for one minute
  3. Serve right away over ice cubes!!


Use fresh ingredients for a refreshing drink!!


Falafel – Veggie patties and health!


The reason I made Pita bread in my last post was to enjoy these lovely Falafels with Tahini! So now you know how I made the pita, let’s get on with these wonderful little veggie patties. In this recipe I deep-fried them, but you can also bake them. Some time soon I will post a recipe with the baked version. For now this is my take on Falafel and Pita pockets filled with Falafel and Tahini.

Recipe at :- https://acupcakeforlove.wordpress.com/2015/09/22/home-made-whole-wheat-pita-bread/

Before I get to the recipe, I would like to tell you that you can use canned chickpeas that have been boiled too. I just used dry chickpeas and soaked them over night so they are ready to be boiled the next morning.

Ingredients: –

  1. Chick peas – 1 + ½ cup (Boiled and cooled)
  2. Garlic – 5 -6 cloves (washed and skin removed)
  3. Coriander leaves – ¼ cup (fresh and stem removed)
  4. Parsley – ½ cup (fresh and stock removed)
  5. Onions – 1 (medium cut into four halves)
  6. Spring onions – 4 (finely chopped)
  7. Sesame Seeds – 1tsp
  8. Coriander Seeds – 1 tsp
  9. Cumin Seeds – 1tsp
  10. Red Chili Powder – 1 tsp
  11. Baking Soda – ¼ tsp
  12. Pepper –1/2 tp
  13. Salt – to taste
  14. Whole Wheat flour – 2tbsp
  15. Lemon Juice – juice from 1 lime
  16. Oil – enough to fry (depends on the size of your dish)


Instructions: –

  1. In the bowl of your food processor, add all ingredients from 1 to 12.
  2. On low process till the chickpeas has crumbled and the ingredients have combined well
  3. Then add whole wheat flour, salt and lemon juice
  4. Run the processor till the mixture combines well
  5. Turn off the processor and touch the mixture to see if it will hold to form a ball (I recommend that you run the processor only for a few seconds at a time, if the chickpeas is worked for too long, it becomes runny and will not hold shape)
  6. Finally when the mixture does hold shape empty into a bowl. Let the mixture rest in the fridge for a few hours ( I leave them over night)
  7. When you are ready to make the falafel, in a wok or deep dish, heat oil on a medium flame
  8. Slowly make patties with the chickpeas mixture
  9. Gently deep fry the patties making sure you do not toss them around or they might fall apart
  10. Once they are nice and golden take them out of the oil and set aside to cool down


 Tahini Sauce

Ingredients: –

  1. Sesame Seeds – ½ cup
  2. Oil – ½ cup (I used olive oil)
  3. Salt – a pinch


Instructions: –

  1. Toast the sesame seeds in a heavy bottom pan. Do not wait for them to turn brown. Make sure you stir continuously to prevent them from burning
  2. Once you know they are roasted evenly, take it off the pan and let it cool
  3. After it has cooled down add oil and toasted sesame seeds in a mixer bowl and processor at high-speed till nice and pasty
  4. Then add salt to the mixture (add more if required)
  5. Process well and pour into a clean bowl ( make sure these is no moisture in the bowl, this will ensure that the tahini last longer)

To assemble the Pita Pocket

  1. Tear the pita into half ( keeping one side attached)
  2. Then add two Falafel patties to the pita pockets
  3. Fill with fresh onions, tomatoes, parsley leaves and Tahini sauce
  4. Enjoy!!!

Home made Whole Wheat Pita Bread


Its actually quite simple to make Pita bread. And as usual I used by food processor to do the mixing and then a little kneading with my hand. A little time to rest and pop them into the oven for wonderful soft home made Pita bread. Now this recipe will give you soft and thin pita bread. I do not like thick fluffy pita, cause then its just a round thinner bun. Also I like more stuffing in my pita than the bread it self. So if you want thicker pita bread all you have to do its roll them out thicker and let them rest for longer after rolling them out.


Ingredients :-

  1. Yeast – 1 tbsp
  2. Sugar – 2 tsp
  3. Water – 1/2 cup
  4. Whole Wheat Flour – 2 cups
  5. Milk – 1/2 cup
  6. Salt – 1/4 tsp

Instructions :-

  1. An a microwavable bowl, combine milk and water and warm till luke warm
  2. Then take the bowl out of the microwave and add sugar to the milk mixture
  3. Add yeast into the sugar + milk + water mixture and let it rest till nice and foamy ( approx 15 mins)
  4. In a bowl of you food processor, add the whole wheat flour and salt
  5. Once the yeast mixture is nice and foamy , pour 1/4 of the mixture to the wheat flour and start the food processor on low
  6. Gradually add in the rest of the mixture to the flour
  7. The entire wheat flour dough should come together into one nice clean ball yet should be sticky when pinched (add or reduce the amount of water as required – the amount of water required by the flour depends on how fresh the flour is and its quality)
  8. Lightly dust your counter top with a little flour ( maybe 1.2 tbsp)
  9. Now empty the dough onto a lightly floured counter top and kneed for a good 5 – 10 mins
  10. You want to made sure you work the gluten and distribute the yeast evenly as well
  11. Lightly oil a glass bowl and drop the wheat dough into the bowl
  12. I usually cover it with a wet cloth and allow it to rest in a warm place ( usually the side of my pre heating oven or a window facing the sun)
  13. Let the dough rest of half an hour
  14. After that divide the dough into equal parts ( i got around 10 medium sized pitas)
  15. Roll them out into prefect circles
  16. Line your baking tray with baking paper and set these pita discs onto them ( leave 5 – 8 cms between them)
  17. Again cover these disc and let them sit for half an hour
  18. Meanwhile preheat your oven to 200C
  19. After half an hour pop the resting pita discs into the oven and bake for 5 – 8 mins ( keep a close eye on the them, do not let them turn brown, they will become hard like biscuits)
  20. You will see them pop up slowly and balloon up
  21. Remove them from the oven and let then cool completely
  22. To cut them out you just need to hold the sides inwards and they usually just tear into nice perfect pockets
  23. Enjoy

Avocado Milk Shake – Baby travel list!!


Hello everybody!! We went traveling last week and therefore I had absolutely no time for anything! This was the first time I am doing 5 days traveling with my baby and I was really worried. But as it turns out, when you have a great husband and wonderful friends, travelling with a baby is a dream!!But while I am on the subject of travelling with a 1 year old I should tell you there are certain things you need to be prepared for and you have to pack before you leave.

So incase you were looking for a list of things to pack when traveling with a baby, here is my list. I hope you find it help full

Food, feeding and milk

  1. Formula /Milk Powder
  2. Powdered dry food / I used Cerelac
  3. Fruits – bananas 2
  4. A bowl
  5. A spoon
  6. Feeding bottles filled with water 100ml
  7. Biscuits ( if allowed)
  8. Bibs – 5
  9. Diapers – I keep 10 in hand and buy the rest near the hotel 😛
  10. If you are breast feeding you definitely want to get a cover or a cloth to cover your self up

Clothes –

  1. I carry exactly 3 times the number of days we are staying any where. So 3 days would mean 3 x 3 = 9 pairs of clothes. Now you can never have enough clothes when you deal with babies. So use this one as the minimum
  2. Socks
  3. Jackets
  4. Caps
  5. Shoes
  6. Towels ( I do not use hotel towels for my baby NOOOO!!)
  7. Wash clothes
  8. Napkins – 1 for each day

Meds and other stuff

  1. One cough, cold med
  2. One allergy med
  3. One mosquito repellant (patch and cream)
  4. Health Supplements (if any)
  5. Sunscreen lotion
  6. Moisturiser
  7. A good diaper rash cream
  8. Lots of wipes
  9. Toys! I carry atlas 4 of them ( give him one at a time so he does not get bored of it)
  10. Any
  11. Hand Santizer
  12. Toilet Paper  ( that just to hold doors if I have to use a public rest room or clean a diaper changing station)

Ok so I think I have covered everything, If i remember any thing more, I will come back and add to this list!

Now onto my avocado Milkshake.

Ingredients :-

  1. Avocado – 1 Large (ripe, deseeded and pulp scooped out of the skin)
  2. Milk – 1.2 lt. (little more if you do not like it thick)
  3. Sugar – 2 tbsp ( you could use honey according to your taste)

Instructions :-

  1. In a bowl of your blender, add the avocado pulp and milk
  2. Blend on medium for 2 – 3 mins till nice and smooth
  3. Then add sugar to the mixture. Blend for another min. Taste occasionally to adjust sweetness.
  4. If you like it a little more runny, go ahead and add more milk
  5. Blend for another min
  6. Finally pour into glasses and serve right away

Notes:-

  • I usually use cold milk, it make the shake nice and creamy. But you can do it will milk that is at room temp also
  • Honey does change the taste of the milk shake, so sugar keeps the taste of the avocado intact
  • Do not keep it for long, I had to throw out a shake I made in the morning, by evening


Lepakshi – Arise Oh Bird!


On a rock, the shape of a tortoise, there stood 5 separate Lingams. Each bearing its own story of how they came into existence. A pious king decided to bring them together under the guard of one stone wall and honour each lingam with its own sanctum sanatorium. Sanctioned by the kings of the Vijayanagara empire in the 1500s the two brother Viruppanna and Veeranna began building this temple to specialy honour the god Veerbhadra. The temple in itself consists of the inner temple, a dancing hall, a marriage hall that depicts the wedding of Lord Shive to Godess Parvathy, and a court yard with pillars, no two similar to each other.

The dancing hall inside the temple is held up by 70 pillars carved from the same stone that this beautiful temple sits on. Each pillar has a different designed carved into it and the main pillars show a beautiful maiden dancing under the guidance of her guru. It is in this mantapa that you will find the famous hanging pillar. 69 pillars of this hall rest on the ground, yet this one pillar remains hanging. It is said that this pillar is the key to holding the entire roof of the hall up! But sadly curiosity got the better of the Britisher who tried to move the pillar and in turn caused a chain reaction therefore ruining all the 69 pillars of the hall. The damage can be seen in every pillar, either bent, broken or crooked.

The temple is an unfinished piece of artificial magnificence. It is said that the king Achutaray had accused Viruppana for embezzling funds from the state treasury and Virupanna was to be blinded for his wrong doing. In his rage, it is said that Virupanna blinded himself and threw his eye balls on the walls of the enclosure behind the main idol of the temple. Even today there remain two holes on the wall with what appears to be a reddish blotch around it and it said to have been tested positive for human blood.


Like many other temples made during this time, this temple is also filled with stories from hindu mythology. It is said that the temple was built by Agasthya muni and he created the magestic statues of lord Ganesha, Shiva and Parvathy.


It is said that during the time the temple was made, the average person measured 8 feet and goddess Sita Devi was considered short.  It believed that the goddess left her foot print on the face of the rock when the great bird Jatayu sacrificed its life trying to save her from Ravana.

The carving on the rock is said to be the platter in which the architects of the building would have their meals.


This temple is a beautiful piece of history that is situated 100kms from the bustling city of Bangalore and is surrounded by farms and rocky landscape. The temple stand as a reminder that no matter how big we aspire to become or how much we dream to create, every step of the way, we must aim for greatness. Greatness not measured by another appreciation but a greatness that we know is different, unique and unparalleled to what we thought was the best!


White chocolate peach cake with rosemary pomegranate SwissMeringue Frosting


Hello everybody!! My baby turned one!! Yes!! Can you believe it?? Its been one whole year and my baby is already running around and eating cake! I love baking and as much as I love who people make such wonderful detailed sculptures and I also loved making them a few times ( with fondant) i have decided that I will never make a cake with fondant or gum paste ever! I just think there is so much more to baking and fondant just makes be forget why I started baking in the first place 🙂

So when I was asked what cake I would make for my baby, I was quick to say “not a fondant cake!! for sure! and the end result was this. The last cake I made was for my husband on his birthday and that was just so much chocolate I decided I wouldn’t do the coco thing anymore. So here is my babys first birthday cake with white chocolate and peach. The frosting is a rosemary infused pomegranate meringue butter cream. And I wanted to share the recipe with you.

Ingredients :-

  1. Eggs – 4 ( separated)
  2. Pomegranate – 1 cup
  3. Powdered Sugar – 1 cup
  4. Butter – 250 gms ( room temp)
  5. RoseMary – 3 long sprigs

Instructions :-

  1. Firstly take the pomegranate and cut it into four and slowly pop out all the seeds within
  2. once you are done with the whole fruit, put the seeds into a mixer and grind for 5 mins
  3. Then strain the juice into a pot. You don want any seeds in the juice
  4. Now heat the juice on a low flame. Add the rosemary to the juice and let it simmer
  5. Let the juice reduce to 90%. You will see that the colour is almost purplish. (Don’t worry)
  6. Now let the reduction cool down
  7. In another pot, on a double boiler, add the egg white and sugar and mix well
  8. Mix till the sugar and eggs have combined well and the vessel is just warm ( don over do it, you will have scrambled egg white)
  9. Now take it off the heat and whisk for 5 mins
  10. You will see how the egg whites turn nice and glossy and slowly form peaks ( 10mins)
  11. Now slowly add the butter a little at a time ( do not pop it all in at once)
  12. You will see the mixture curdle. But trust me do not stop whisking!! it will go back to the nice firm peaks. Just give it time. Now turn your whisk on high and whisk for another 10 mins
  13. I know there is a lot of whisking but trust me it tastes so much better that just butter cream
  14. When you see the mixture come to the required  consistency add the pomegranate reduction
  15. Finally pop the frosting into your piping bag and you are all set to pipe out your design
  16. You can store the frosting for one week in an air tight box


Street Style Boiled Peanuts – (Bangalore food)


This post is not much of a recipe post but I did want to include it cause it brings back wonderful memories of cold rainy days after college and this old selling steaming hot boiled peanuts, right outside the gates. Even today when its raining and cloudy, I can smell that salty peanuty air. I would get a handful for 10 Rps but it was so good! I could hear my moms voice asking me to think twice before popping one into my mouth. But I would quickly dismiss the thought as I would convince myself that the water was boiling and therefore did not really matter. But soon I realised that you could make the same thing at home. So this is my version of the boiled peanut 🙂

Ingredients :-

  1. Peanuts – 1/2 kg ( in the shell)
  2. Water – 2 cups
  3. Salt – 1 tbsp

Instructions :-

  1. In a cooker add water and salt. Mix well.
  2. Then add the peanuts
  3. Turn on the flame and let the whistle blow 3 – 4 times
  4. Then turn off the flame and let the cooker let out all the steam on its own
  5. Finally open the cooker and serve right away!!

*Variations – You could add a little chilli powder or lime juice