Green Falafel Meal Bowl – with lemon couscous and pita chips (Baked)

dsc_0310

dsc_0296

Hello my dear wonderful readers!

How are you all doing today? I hope your weekend was fun. We had a quiet time this weekend. A little work but mostly lounging around the house and catching up on lost sleep. After my baking marathon in December, I decided to set new goals for myself with regard to my health. So I woke up early for a run and some work on the elliptical (cross) trainer and oh my god! My body hurts so bad!! hahahaha. Infact as soon as I got out of the gym I felt like I was walking on clouds 🙂 So funny. But on the bright side I could feel the blood rush to my face and now there is pinkish tinge that make me look, lets say “livelier” haha.

Anyway so today is Monday and we go meatless and eggless on Mondays. So this seemed to be the right post for today. This meal is so good and so healthy, you wont feel soo full and yet you would have the nutrition of a balanced meal.

The falafel is baked and not deep fried ( cause we did quite a lot of frying last few weeks) and I used a handsome amount of parsley, spinach, corinder and mint in the dish, to give the patty its nice green colour + they just taste really good. Served on a bed of lemony cucumber couscous along with some green salad and pickled beets which makes this dish just the best kind of meal that wont make you feel like you are missing out on anything.

Ingredients :-


  1. Boiled Chickpeas – 3 cups
  2. Spinach – 250 gms ( blanched )
  3. Flat Leaf Parsley – 1 cup
  4. Mint – 1/2 cup
  5. Fresh Coriander – 1 cup
  6. Garlic – 6 large cloves
  7. Pepper – 1 tsp
  8. Coriander Seeds – 1 tbsp
  9. Onions – 1/4 cup (finely chopped)
  10. Salt to taste
  11. Sesame Seeds – 3 tbsp
  12. Olive Oil – 1 tbsp


Instructions :-


  1. In the bowl of your blender, add all the ingredients
  2. Now with the speed on medium – blend to form a coarse mixture
  3. Scoop out a little and see if it holds shape – If not add 1 tsp of water and grind further
  4. Now pre heat your oven to 180
  5. Place a baking paper or silpat mat on the baking tray and set aside
  6. Using a small ice cream scoop or a table soon, slowly scoop out small balls and place on the prepared baking tray
  7. Using the back of a spoon push gently to flatten the tops
  8. Drizzle with olive oil just for the perfect crispness
  9. Bake for 20 – 25 mins or till they turn golden brown
  10. Once done, take them out of the oven and place to cool completely
  11. Serve with couscous or pita bread and with a salad of choice


Parsley, roasted garlic and Lime Garlic Knots


dsc_1432

dsc_1387

Hello my Dear Wonderful Readers!

How are you all doing today? As the weather changes and the cold sets in, I find myself pulling out my blankets, fuzzy socks and jackets out. So in anticipation of soup season, I also have a feeling we will have a lot of bread making in the house too. Did i mention I ruined my oven? Yes, so while I was getting the house ready for Diwali, last month, I cleaned the oven and when I turned it back on, the whole house lost power!!! Yeah I managed to destroy my favorite kitchen apparatus and I havent gotten around to getting the company guys to come take a look at it either (talk about being lazy) :-).

So this time I made my bread in the “convection” mode of my microwave oven and to my pleaseant surprise in really does work! how awesome is that. Now did I mention that this recipe also incorporates, whole wheat? Yes, sir it does!! So I added equal amounts of bread flour and whole wheat flour to make these babies so that they are not all that unhealthy and make a perfectly wholesome meal when paired with a big bowl of healthy soup.

Do you guys love the small bread baskets that they serve in Italian restaurants? With the flavoured butter? I am a sucker for them. While my husband refuses to have it cause he says its a distraction from the main food. I say I love it all.. hahaha..

Ingredients :-


  1. Bread Flour / Maida – 1 + 1/4 cup
  2. Whole Wheat Flour / Atta – 1 + 1/4 cup
  3. Sugar – 1 tbsp
  4. Salt – 1 tsp
  5. Oil – 2 tbsp
  6. Yeast – 1 tbsp
  7. Water – 1 cup (warm)
  8. Garlic – 9 cloves
  9. Lime – 1
  10. Parsley – 1/4 cup (chopped fine)
  11. Butter – 50 gms (at room temperature)


Instructions :-

    1. In the bowl of your stand mixer, add sugar, water and yeast. Set aside to rest for 10 mins. In 10 minutes it should have become nice and frothy
    2. Into the same bowl, add the flour, salt and oil
    3. With the hook attachment on, turn on the mixer to a medium speed for 7 – 10 mins
    4. It will form a nice sticky dough
    5. Grease a big glass bowl and tip the dough mixture into the bowl
    6. Let it rest for 2 hours or till the dough has doubled in size
    7. Meanwhile, drizzle a little oil over the garlic cloves and put them into an oven at 200 C for 15 min or till they are golden and almost black on the outside. Once they have cooled down, with the back of your spoon, press them to form a nice paste
    8. Now take a bowl and add the melted butter, zest the lime, chopped parsley and garlic paste. Season with salt and mix well and set aside
    9. Peheat your oven to 200 C and line a baking tray with baking paper
    10. Once the dough has doubled in size, tip the dough onto a floured surface.
    11. Slowly knead the dough for 2 mins
    12. Then make a large ball and cut it into 2. Then cut them into 5 each. You should have around 10
    13. Slowly roll out the dough into long rolls
    14. Then just like you tie a shoe lace, tie the knot with the rolled out dough
    15. Once you have made the knot, place on the prepared baking tray. Do the same with the remaining dough
    16. Dip a pastry brush in some olive oil and brush the tops of the knots lightly
    17. Place the tray in the pre heat oven and bake for 15 – 20 mins or till lightly golden on the top
    18. During this time, melt the butter mixture in a microwave
    19. As soon as the knots are ready take them out of the oven and dip them into the melted butter
    20. Use a mitten while you dip the knots as they will really hot!!
    21. After dipping them, place them back on the tray
    22. Just before you serve them, brush again with the flavored butter!!


The Infinity Burger – Chinese 5 Spice Chicken Burger with Caramelised Pineapples and Home made Chilli Mayo

DSC_0965

DSC_0981

DSC_0966

DSC_0963

DSC_0969

Hello my Dear Wonderful Readers!!

How are you all doing today? This the weekend and I have so much lined up to do. Starting with cleaning the fridge! lol. But before I get to the “Work” we have scheduled a little fun time with the baby boy too. I had decided to sleep in today but as usual, my son wakes up early only on the weekend! I think babies have a way of sensing when it is the weekend and how to make sure our day circles around their needs and desires. So Cute.

Have you tried the Chinese 5 spices mix?? Its insane!!! Its just everything I love about spices. Its got heat, aroma, sweetness! its got everything. Its like the Chinese Garam Masala 😛 I love this spice mix and its so so easy to make. The ingredients are always readily available in any Indian Kitchen and its super easy to make. Dry roasting the spices first makes sure to bring out the maximum flavour from them. You could always buy the spice mix at any local market but why would you when it is soo easy to make at home and tastes 100 times better! The 5 spices are – cinnamon, clove, star anise, fennel seeds and pepper corns. Make sure to dry roast them till you get this wonderful aroma of the spices (take care not to burn them). Also when you powder them make sure your blender is absolutely dry!! I mean no moisture at all. This way they spices can be stored in an air tight container and used for later too.

This burger is absolutely the best thing to have on a Friday night with a glass of any alcohol you like. It pairs really well with Vodka (:p). Like most burgers I haven’t used cheese or any type of sauce in the burger but I did make a creamy chilli mayo to go along with the burger. I do not like sloppy burgers so I did not add the mayo to the burger but we dipped the potato wedges into the mayo and had it along with the burgers. Oh it was heaven!!!  I have used chicken breasts and marinated them overnight, but even 3 hours should also work. To make the best burgers you have to use the freshest ingredients (be it the meat, the bread and the veggies). So make sure you take a trip to your local market and get fresh produce for the burger. I make sure I don’t store meat, I find it tastes different and it absorbs less of the marinade if it’s old meat( by old i mean – left in the freezer for a few days).

PS: – My husband named it the Infinity Burger. Lol.

Ingredients for the 5 spice powder – 

  1. Cinnamon  – 3 large sticks   or 1 tbsp cinnamon powder
  2. Cloves – 1 tbsp
  3. Star Anise – 5 large
  4. Fenne Seeds – 1 tbsp
  5. Pepper Corns  – 1 tbsp

Instructions :-

  1. Heat a large heavy bottom pan
  2. When the pan is hot add all the spices and dry fry till they start to emit a wonderful aroma
  3. Make sure to stir constantly and fry on low flame
  4. Now transfer the spices into a grinder and grind to fine dust
  5. Store in a dry air tight container

Ingredients for the Chicken :-

  1. Chinese 5 spice powder – 2 tbsp
  2. Chicken Breast – 6 ( large)
  3. Soya Sauce – 3 tbsp
  4. Apple Cider Vinegar – 3 tbsp
  5. Ginger – 1 tbsp
  6. Garlic – 1 tbsp
  7. Chilli Powder – 1 tsp ( or according to taste)
  8. Brown Sugar – 1 tbsp
  9. Oil – 2 tbsp
  10. Lime Juice – juice of one lime
  11. Oil – 3 – tbsp –  for frying the chicken
  12. Pineapple Slices – 12

Instructions :-

  1. Firstly using a mortar and pestle grind the ginger and garlic to from a nice paste
  2. In a large bowl mix all the ingredients for the marinade (expect the chicken pieces)
  3. It should form a nice thick paste. Add 1 tbsp of water if required to bring it to a nice thick saucy consistency
  4. Then add the chicken breast and coat the breast properly with the marinade
  5. Cover and set in the fridge for 3 hours or overnight
  6. When you are ready to fry the chicken, heat oil in a frying pan
  7. Then add the chicken pieces two at a time. Cook with the cover on for the first 10 mins on medium flame
  8. Then take off the cover and crank up the heat – this will give you that charred dark brown caramelisation on the chicken
  9. Set aside on kitchen paper to soak up any excess oil
  10. In the same pan when the pan is hot, add the pineapple slices and fry on high. This gives the pineapple a nice caramelised exterior and it gets coated with the spices left in the pan ( Yuuummmmm!!!)

To Assemble the burger – 

Ingredients :-

  1. Burger Bread  – 3
  2. Lettuce leaves – 12
  3. Red Onions Slices – 2 large onions sliced
  4. Pineapple slices – 2 for each burger (more if you like)
  5. Chilli Mayo – as required

Instructions :-

  1. Cut the burger bun into two halves
  2. Then place lettuce on the bottom half
  3. Then add 3 onions slices
  4. Then add two of the fried chicken breasts
  5. Add another layer of lettuce
  6. Then the caramelised pineapple
  7. And finally the top half of the burger bun
  8. Serve right away with a side of chilli mayo and some potatoes wedge!!


Enjoy!!!!!!


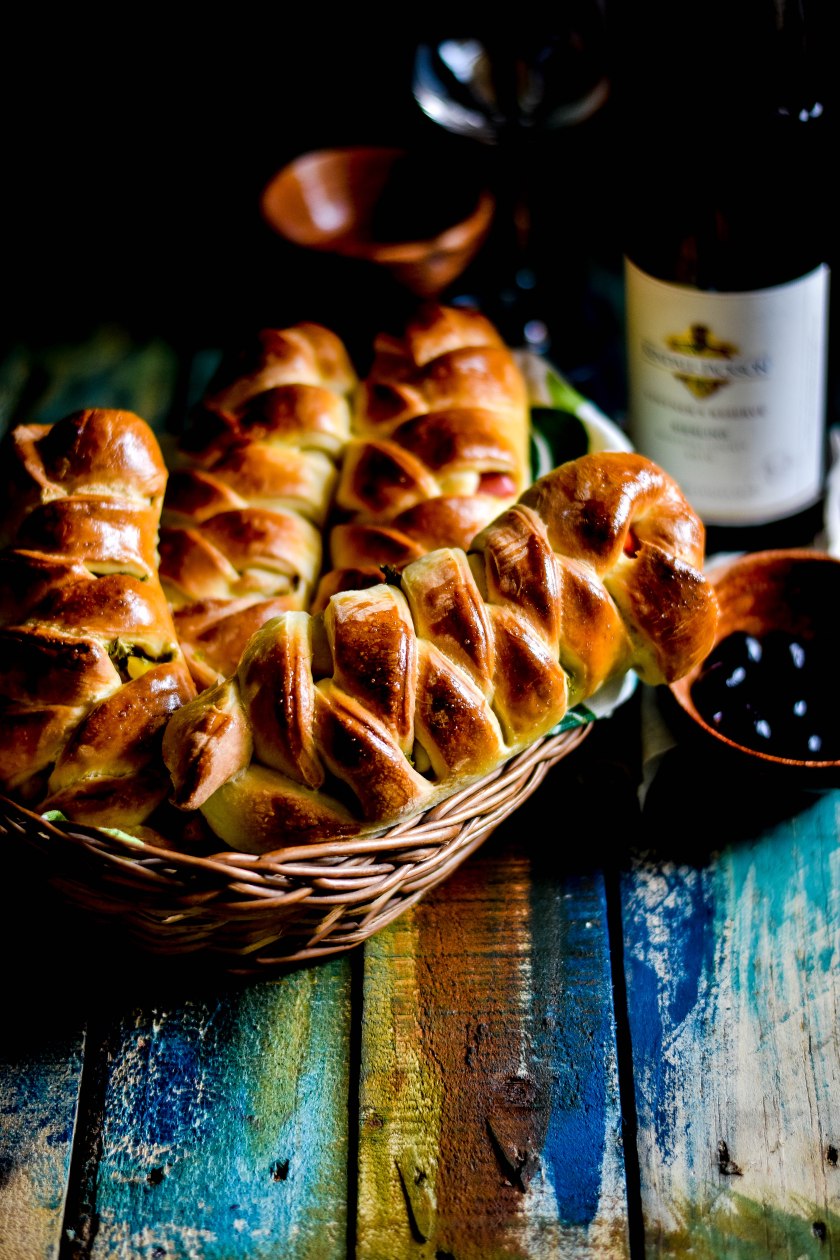
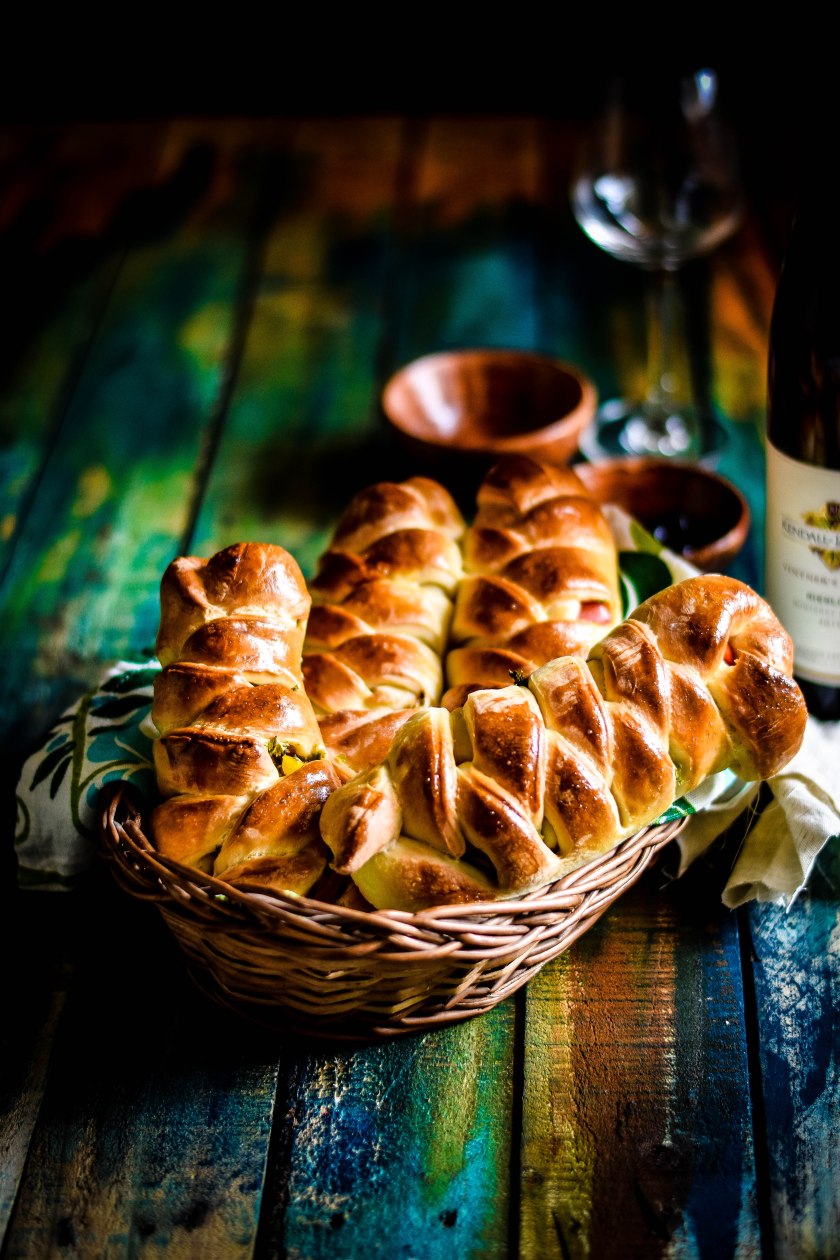
Bell Pepper and Sausage Rolls – Sausage rolls my way :)

DSC_0331

DSC_0390

DSC_0397

DSC_0399

DSC_0410

DSC_0416

DSC_0419

DSC_0428

DSC_0477

DSC_0463

DSC_0458

Hello my Dear Wonderful Readers!!

So guess what!! I finally baked bread today! It feels like ages since I baked some bread. In fact I have no intention of baking today. I wanted to make a simple paneer dish for dinner and post it on the blog but my son decided to sleep for a few hours during the day, which gave me some time to write this post. Keeping in mind the requests of many followers on Instagram and the blog, to take photographs of the procedure of making the bread too, I have take a few shots of that as well. I know its not the prettiest but I am getting there.

Now before I get to the recipe, I want to share a very fond memory that I have with sausage rolls. When I was around 6, my mum had just gone back to work and she would always be back home before I got back from school. But every time I came back home, I was sure there would be a special treat at home. Some time it would be these Sausage Rolls. Very often  Amma would make them at home, but some times she would buy them from my favourite bakery “Hot Breads”. I still remember the distinct blue and white lines under the logo and that smell of fresh baked bread! Ohh!! My Amma would also make bread at home. In fact last week she gave me a cake book that I remember reading when I was very small. Most of my birthday cakes where inspired from photos in that book. These memories are close to my heart. My mum is the best baker ever! In fact her oven broke down a few months ago, but that doesn’t stop her from baking at all. She can make the most fluffiest sponge cake even on an iron skillet!! haaa!

Ok so back to the recipe. Now this is my take on the famous sausage roll. I know that the original sausage roll does not have bell peppers but I wanted to give it my own twist and an excuse to add some vegetables in there 🙂 So here it is.

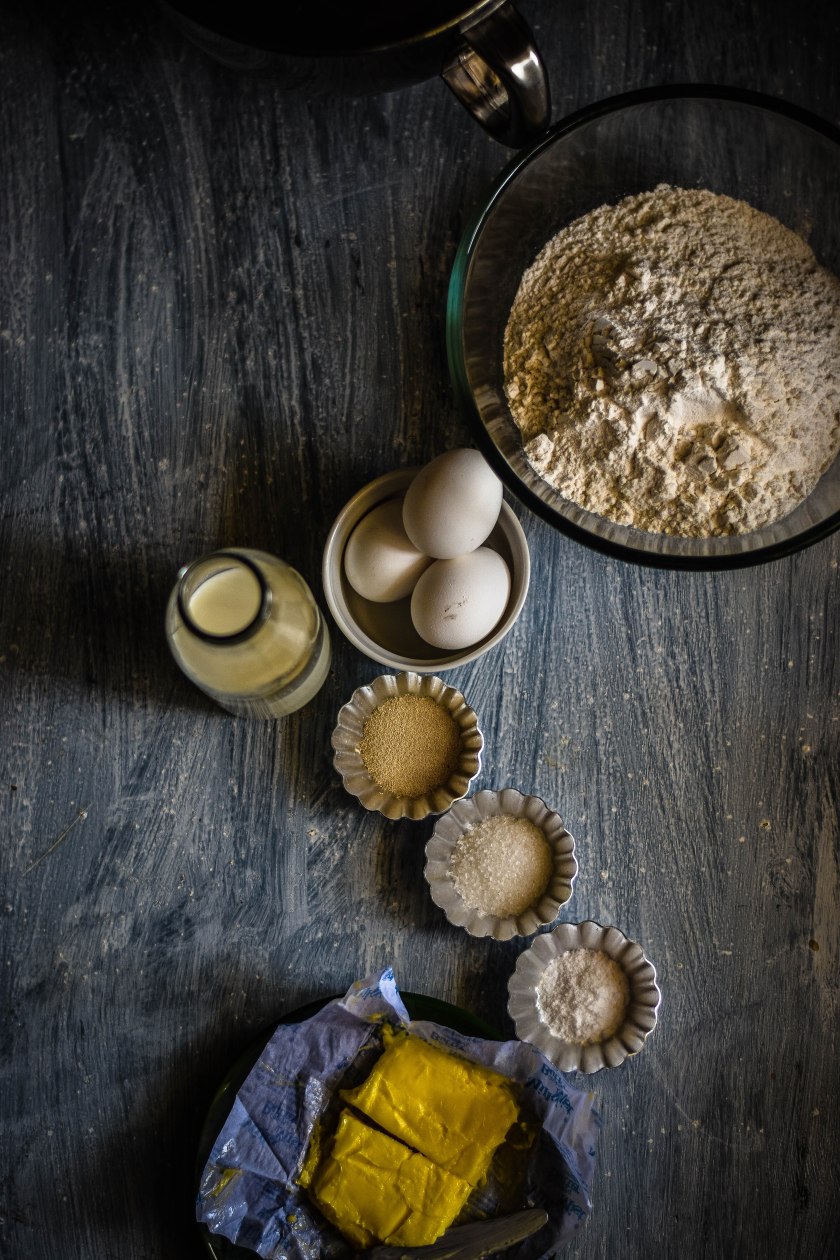
Ingredients for the bread :-

  1. Bread Flour – 3 cups + 3 tbsp
  2. Sugar – 2 tsp
  3. Active Bakers Yeast – 2 tsp
  4. Milk – 1 cup
  5. Butter – 50 gms (melted and cooled)
  6. Eggs – 2 + 1 for the egg wash
  7. Salt – 1 tsp
  8. Olive oil – 1 tsp

Instructions :-

  1. In the bowl of your stand mixer combine half the four, sugar and yeast. Give it a good mix
  2. Now add butter and two eggs and with a fork combine them
  3. Next turn on your mixer on low and slowly add the milk
  4. Finally add rest of the flour and crack up the speed to medium
  5. Run the mixer for 5 mins
  6. Finally add the salt and mix for another 3 mins
  7. Grease a glass bowl with olive oil and place the dough in it. Cover with a warm cloth and keep the bowl in a warm place to rise.
  8. Let the dough  sit for 2 hours or until it has doubled in size

Ingredients for the filling:-

  1. Red Bell pepper – 1 – chopped to squares
  2. Yellow Bell Pepper – 1 – chopped to squares
  3. Garlic – 5 ( chopped fine )
  4. Oregano – 1 tsp
  5. Thyme – 1 tsp
  6. Rose Mary – 1/2 tsp
  7. Pepper – 1 tsp
  8. Fresh Parsley – 1/2 cup
  9. Salt according to taste
  10. Chicken Sausages – 6
  11. Oil – 3 tbsp

Instructions for the Filling :-

  1. Heat oil in a pan
  2. Once the oil is hot add the garlic and fry for a min on medium
  3. Then add the sausages and fry for 5 mins ( just to start the cooking process)
  4. Then add the Oregano, thyme, rosemary, pepper and salt
  5. Give it a good mix and then add the peppers
  6. Cover and cook for 3 mins and turn off the flame
  7. Let the filling cool before you use it in the next step
  8. Use the parsley just as it is, fresh over  the top of the cooked filling


Assembling the roll :-

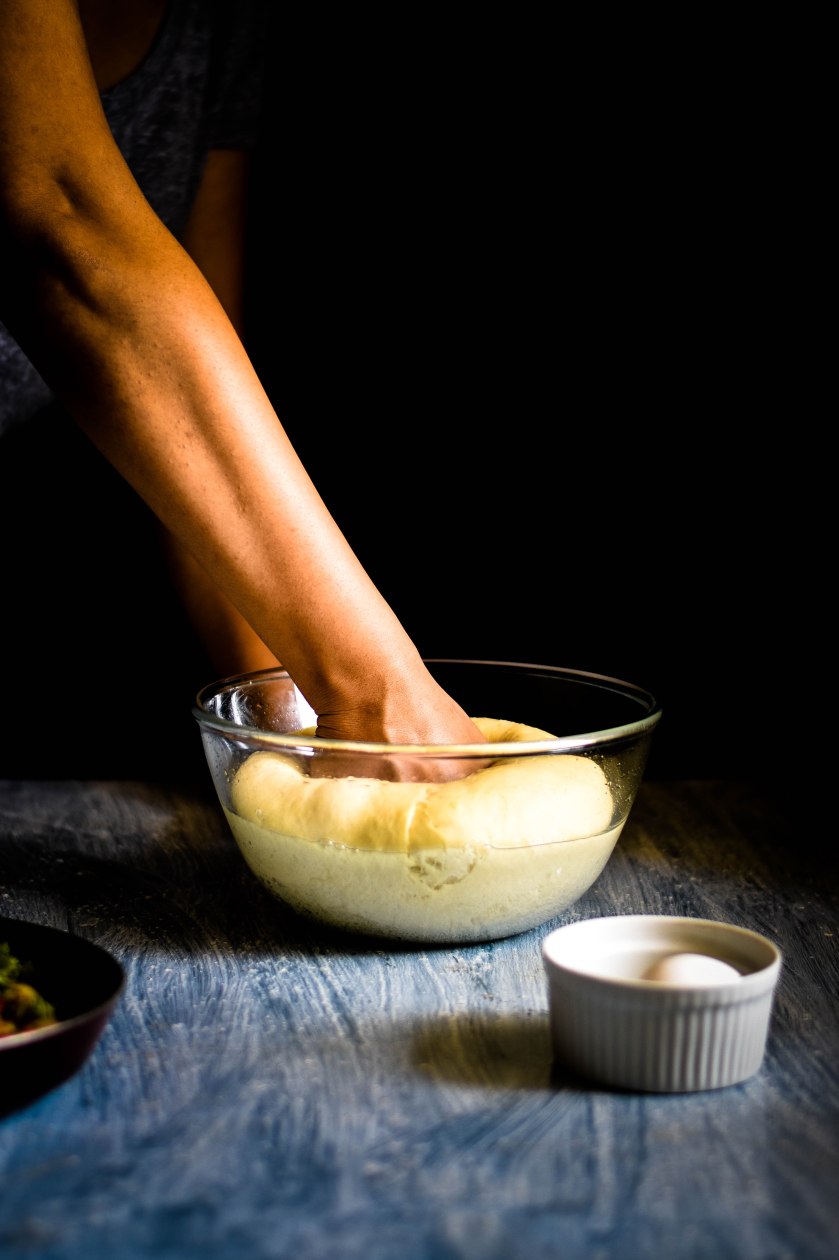
  1. Once the dough in doubles in size, punch it down with your fist
  2. Then empty the dough onto a flour dusted surface
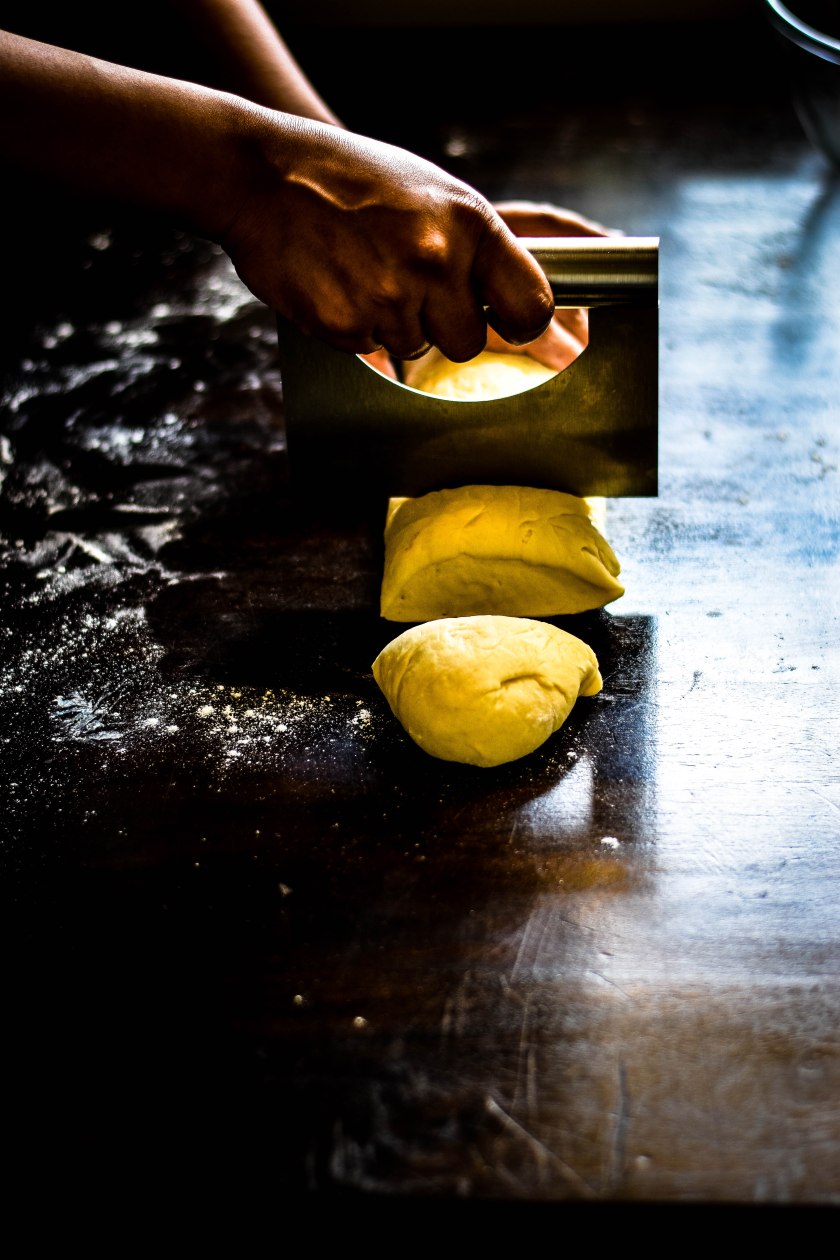
  3. Roll the dough out to the shape of a log. Then using a pastry cutter or a sharp knife, divide the dough into 6 equal halves.
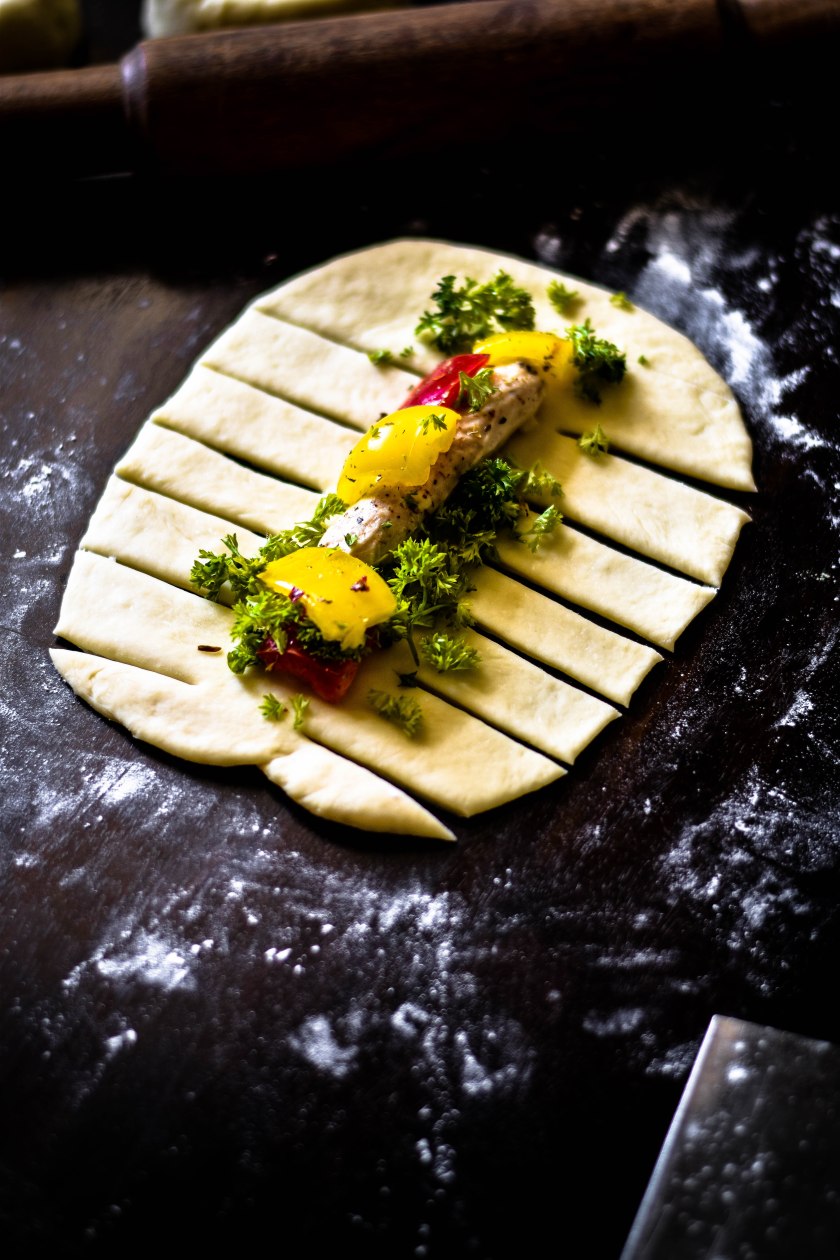
  4. The roll out each individual pieces into 15 cm x 25 cm square pieces, leaving enough space in the centre for the filling (at least 6 cms)
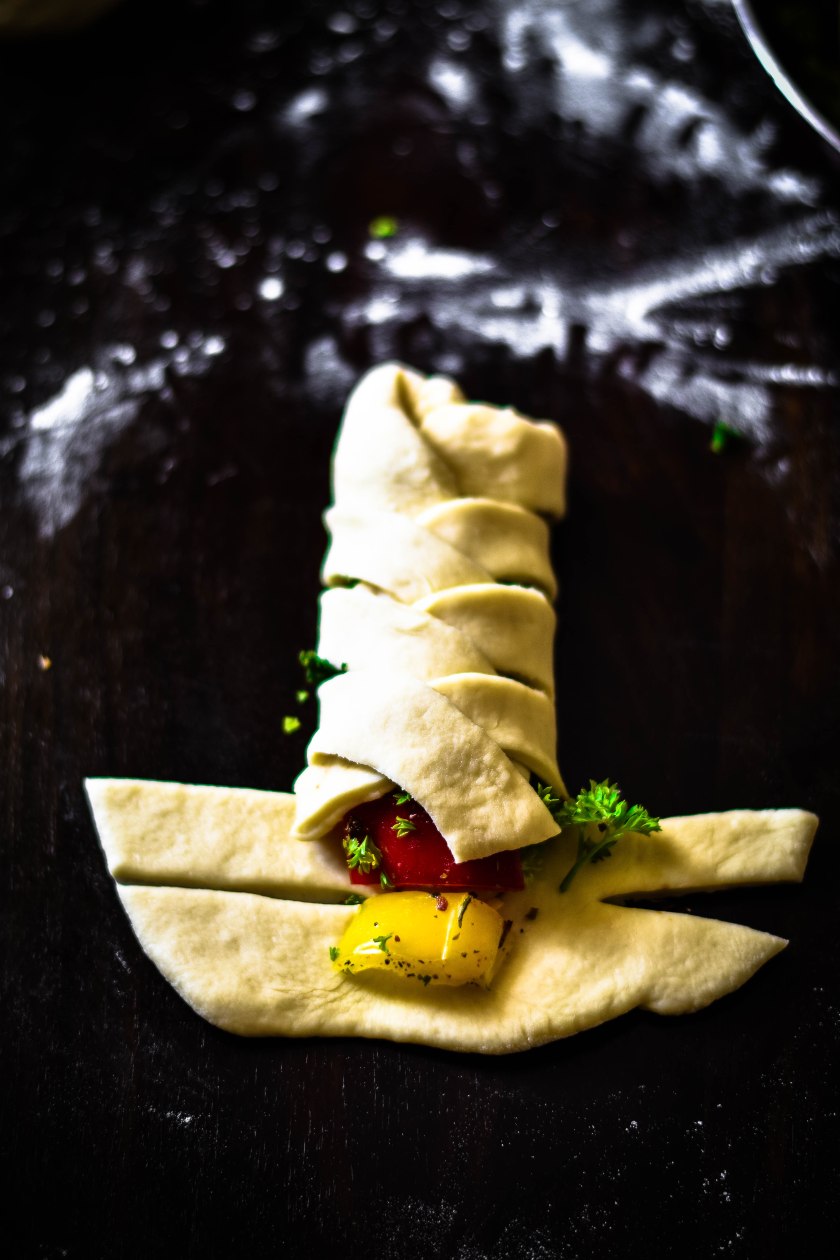
  5. Slash 5 -6 lines on each side of the rolled out piece (as shown in the photos)
  6. Then add the filling into the centre of the rolled out dough. Make sure to sprinkle the fresh parsley over the filing
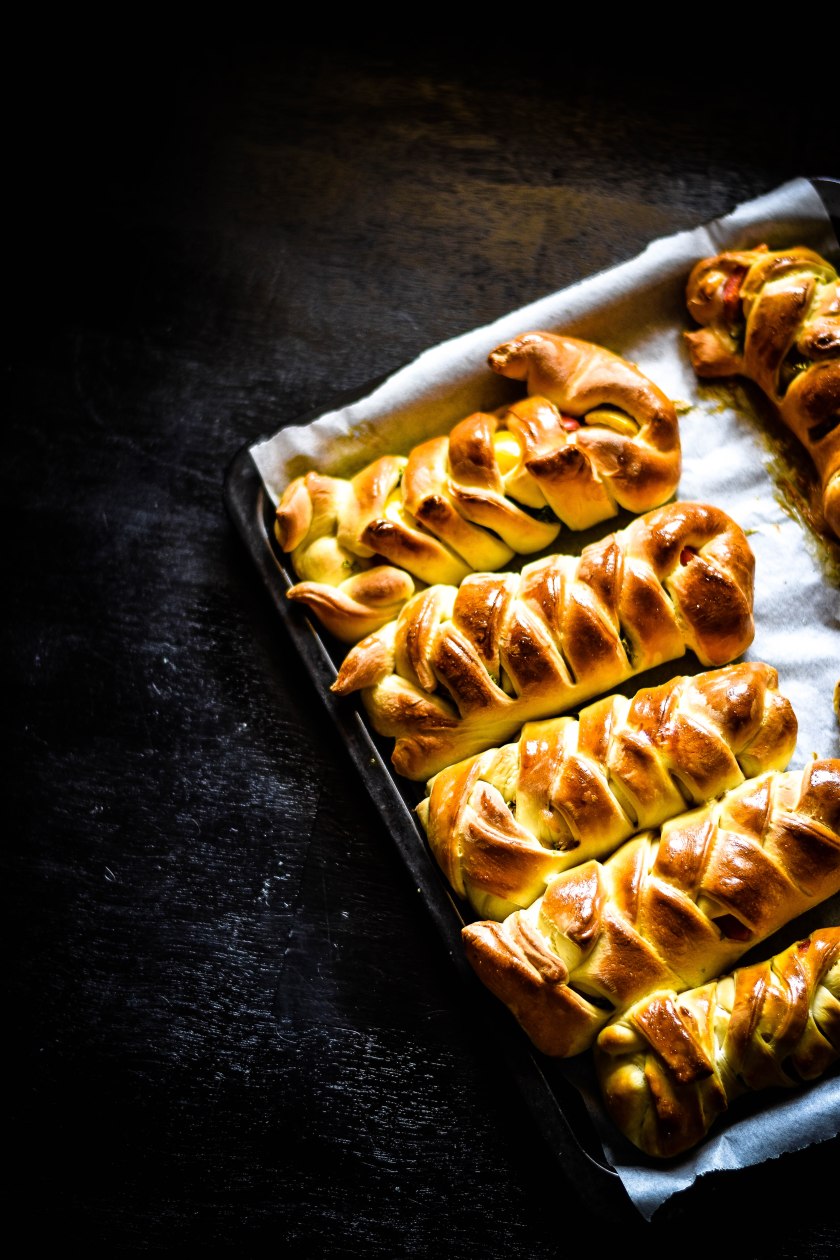
  7. Then start from the top. Tuck the top most piece of dough on top of the filling, then alternatively cover on over the  other ( as shown in the photos). I start with the right, lift the pieces of dough from the right and over lap the filling and pull gently towards the centre and then towards the left. Then take the piece of the left and gently place over filling in the centre and then over to the right. After you do two of them it will become easier. Make sure to press the ends of the dough at the end or else they come out a little wonky when you bake them ( like some in the photos 😛 )
  8. After you have done all of them, transfer them to a baking sheet lined with baking paper
  9. Cover and let it sit for 20 mins
  10. During this time, pre heat your oven to 200 C
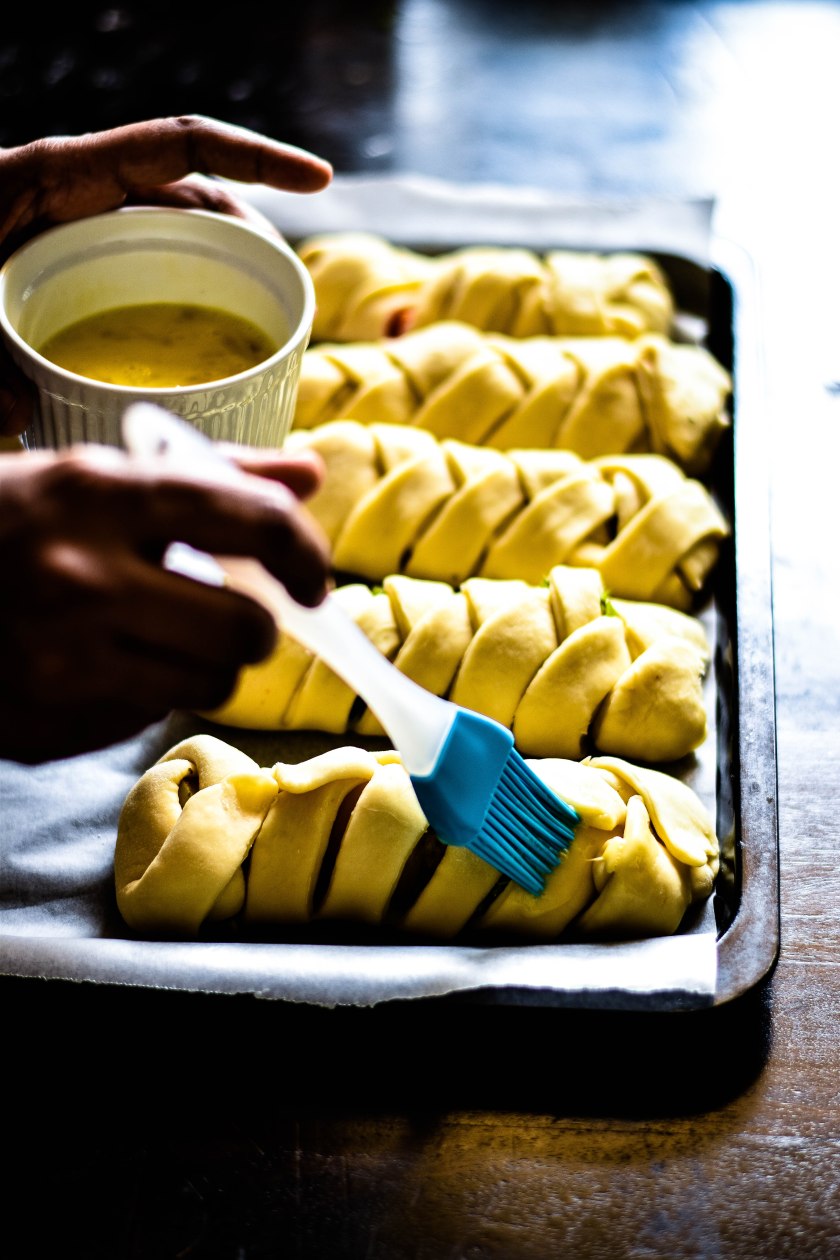
  11. Crack the last egg and beat it well
  12. Then using a pastry brush, gently brush the tops of the rolls with the egg wash. This is what will give it that wonderful golden colour
  13. Pop the baking tray into the oven and bake for 30 mins or until you the see the tops turn nice and golden brown
  14. Once they are done baking, pull them out of the oven and let them cool in the baking tray for 10 mins
  15. Then move them to a cooling rack and let them cool completely
  16. If you wanna store them, wrap them in cotton cloth and then put them in an air tight container in the fridge


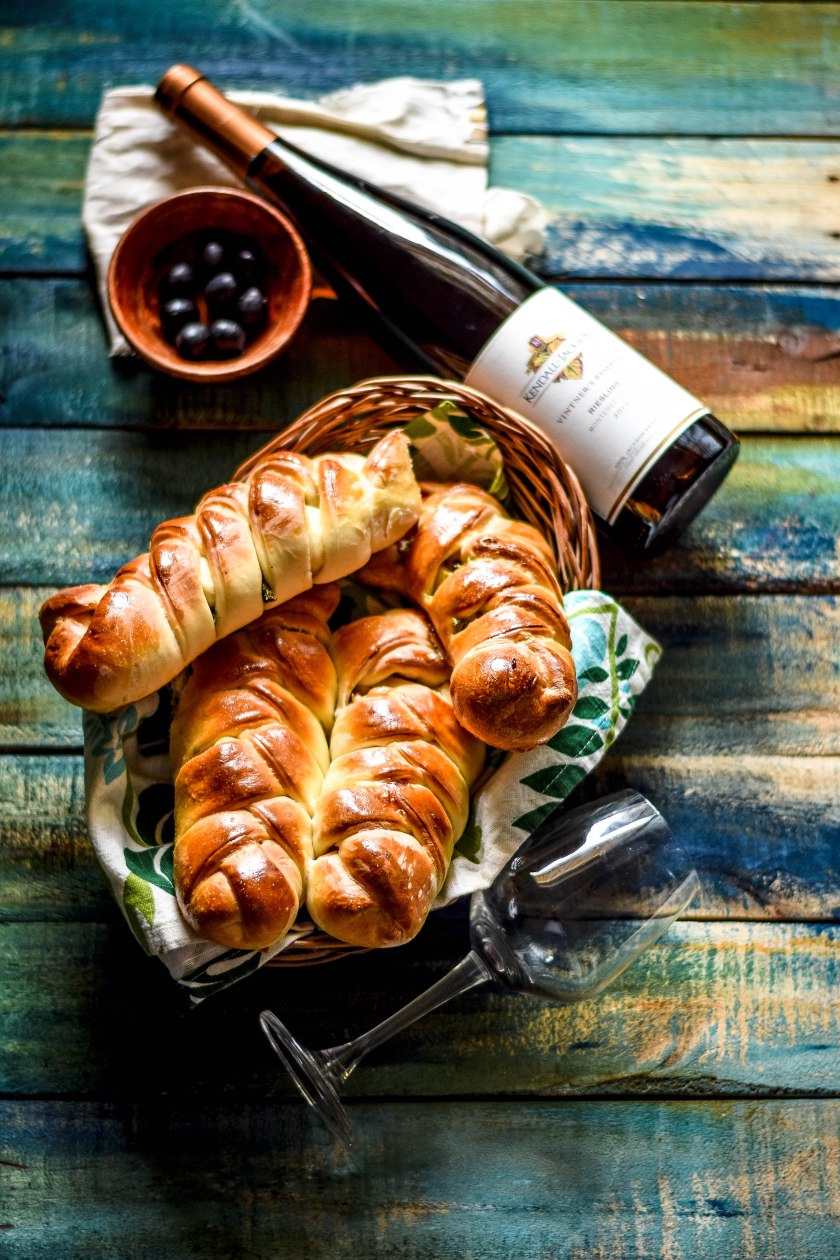
Serve these babies with ketchup or mayo or just like that!!